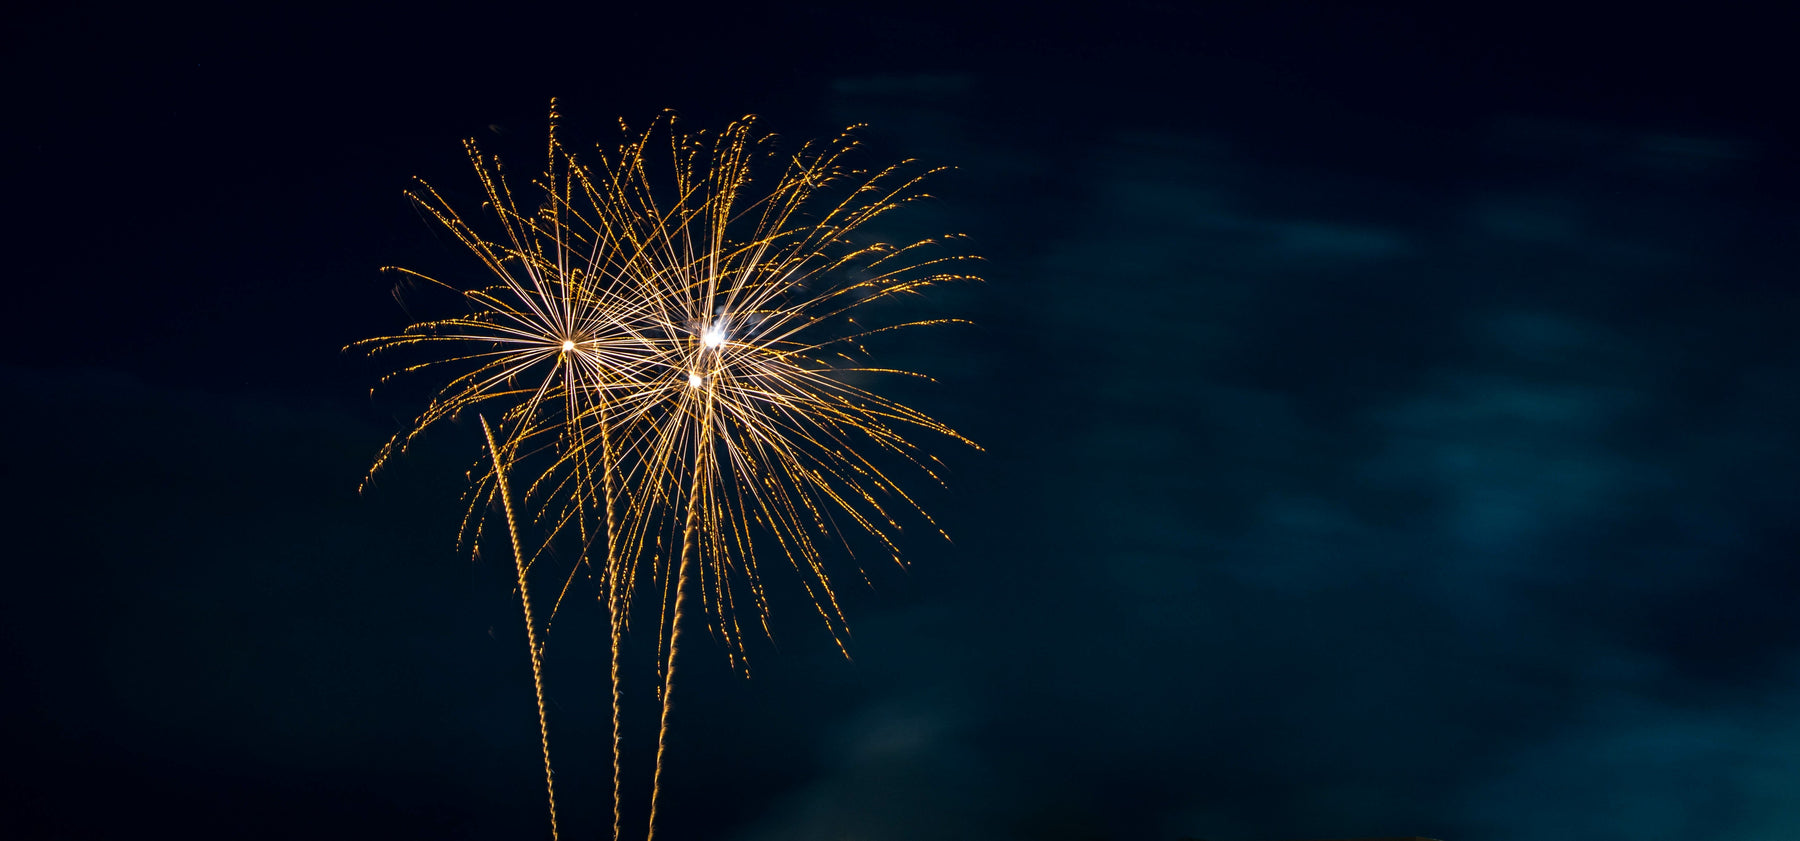
Nine essential tips for photographing fireworks
Photographing fireworks is remarkably easy, but a little preparation and thinking will help you get the best shots at your local display. Andrew James, in his article for Amateur Photographer, offers nine tips as how to get better shots.
Photographing fireworks requires you to take full manual control over the camera, so if you’ve never strayed away from auto before now is the time to do it.
You’ll also be working in the dark, so it pays to do some preparation first. Here are some things you need to know about photographing fireworks before venturing out.

1. Use a tripod
If you are going to be photographing fireworks, you will need a tripod. As you will be working in the dark and exposures are likely to be 10secs or more, the camera must be fixed securely in place so that no camera movement can ruin your shot. Also ensure that all three legs are tightly locked so they won’t slip. Even a minuscule amount of movement can spoil the image, so don’t take that chance.
Remember to switch off any image stabilisation in your lens because it won’t be necessary when the camera is on a tripod – and it could actually cause the image to blur slightly.

2. Remote release
There is no point mounting the camera on a tripod if you then jog the camera when you fire the shutter by hand. Instead, you should use a remote or cable release to allow safe, jog-free operation of the shutter.
If you don’t own a remote release you can use your camera’s self-timer, but the delay between pressing the shutter button and the exposure starting means you might miss the optimum moment to take the shot. To avoid this as much as possible, set the time delay from pressing the button to the shutter firing to the minimum that your camera allows.
3. Focusing
If it’s so dark that you can’t see your hand in front of your face, how are you going to focus? The simplest method is to manually focus the camera to infinity, which should be marked on your lens. You will normally be far enough from the fireworks so that once the lens is set to infinity, you can just leave it there.
Alternatively, shine a torch onto something approximately one third of the way into the scene and focus on that point. This could be the heads of the crowd watching the fireworks display, for example.

4. Head torch
A head torch is a hugely practical piece of kit that is perfect for anyone who regularly takes photos at night. You can use it to help illuminate the camera when you need to make adjustments, or to shine on objects you need to focus on. Because the torch is fixed on your head, both hands are left free to operate your kit, or even eat a hotdog!
5. Scout out your location in daylight
If you intend to visit a local fireworks display, then it’s definitely worth casing the joint first! Find out where the fireworks are going to be released from and where the front of the crowd will be, as it will help give you an idea of where best to set up. Look for high ground to shoot from, and consider what is in the background and anything that can be used to give your image a fresh twist.

6. Take a stepladder or box
If you’re lucky enough to find some high ground to shoot from, you’re doing well; if not, you might find yourself stuck behind a crowd of spectators. To frame them neatly at the base of your shot, you’ll need your tripod extended to its maximum height. But unless you are equally tall, this makes it difficult to look through the viewfinder to frame the scene or make exposure adjustments. So borrow a tip from the paparazzi who often jump onto little step ladders or boxes to give themselves a boost in height.
7. Play with the exposure
It is all too easy to underexpose or overexpose your fireworks shots. If you find that your fireworks look too bright, try altering your settings to achieve a darker sky and crisper fireworks.

8. Use reflections
If you’re lucky enough to be photographing fireworks near water, then reflections work really well. Being further from the display might mean fewer crowds to contend with too!

9. Tips for taking the shot
1. Frame your shot and focus either to infinity or on a point roughly one-third of the way into the scene
2. Set your camera to manual exposure or bulb. Manual exposure is probably best to start with, as exposures are unlikely to last much more than 5-10secs. Bulb is better when you need to keep the shutter open for a much longer period of time because the shutter remains open until you press the shutter button a second time to close it
3. Set a low ISO, such as ISO 100 or 200. This will help keep noise to a minimum, and because the camera is fixed on a tripod you don’t need to worry about setting a fast shutter speed
4. Set your aperture to f/8 as a starting point and your exposure to 5secs. When a firework goes up, open the shutter using the remote release, then review the result on the back screen
5. If you want to ensure you are getting more than one firework exploding within the scene, take a small black card that you can hold over the front of the lens. If you don’t have a card, then a cupped, dark-gloved hand will work, but take care not to touch the lens itself. Extend the exposure time and hold the card over the front of the lens between fireworks to prevent any ambient light entering. The shutter may be open for 15secs or 20secs, but as you are holding back the exposure with the card, the camera is only capturing the light trails from each separate explosion. This technique works best with bulb mode, especially if you need to extend the exposure.
Article reproduced and Copyright: Amateur Photographer 2017